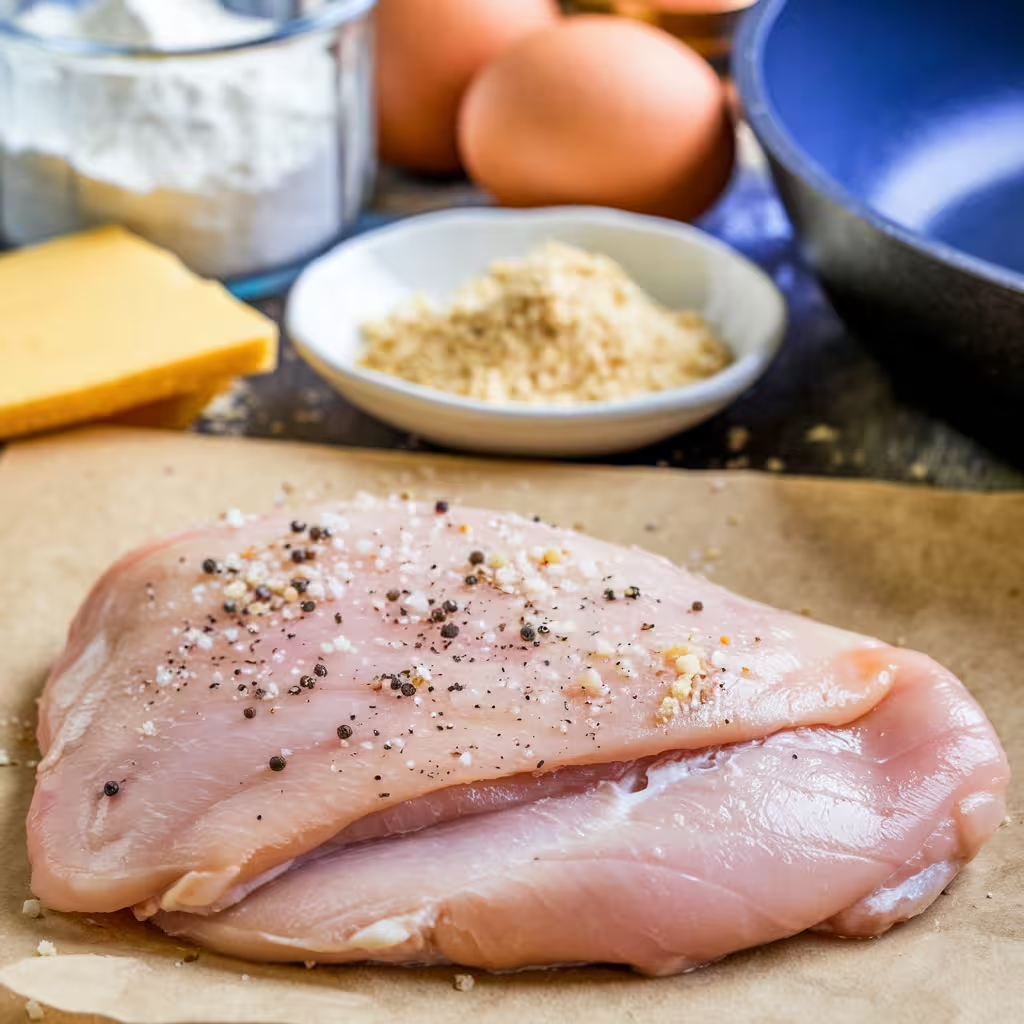
When it comes to the perfect chicken parmesan, the foundation starts with the chicken itself. One of the most essential steps in achieving that flavorful, tender, and perfectly cooked dish is knowing how to flatten chicken properly. Flattening chicken ensures even cooking, helps flavors meld beautifully, and gives you that perfect presentation. This article is your ultimate guide to mastering the technique of flattening chicken for chicken parmesan. You will learn step-by-step methods, tips for success, and all the essential tools you need.
Understanding the Importance of Flattening Chicken
Why Flattening Chicken Affects Texture and Flavor
When you flatten chicken, you are not just changing its shape; you are significantly impacting its texture and overall flavor. Flattened chicken breasts cook more evenly and quickly, reducing the risk of dryness. This method also allows for more surface area to soak up sauces and seasonings, which is crucial when preparing chicken parmesan.
Techniques to Achieve the Perfect Flat cutlets
There are a few different techniques you can use to flatten chicken, each producing different results that can complement your chicken parmesan recipe. Understanding these methods helps you decide which is best for your cooking style and needs.
Essential Tools for Flattening Chicken
Utensils You’ll Need in Your Kitchen
Utensils You’ll Need in Your Kitchen
Before diving the practical steps of flattening chicken, it’s crucial to ensure that you have the right tools for the job. Each utensil plays a specific role in not only simplifying the process but also enhancing the quality of your dish. Here’s a detailed look at what you’ll need and why these tools are essential:
Meat Mallet or Rolling Pin
A meat mallet is the go-to tool for this task. Designed specifically for tenderizing and flattening meat, a mallet typically features two sides: a smooth side for flattening and a textured side for tenderizing. The smooth side is ideal for evenly flattening chicken breasts without damaging the meat fibers, ensuring they cook uniformly.
If you don’t have a meat mallet, a rolling pin can work in a pinch. While it lacks the specialized design, a rolling pin provides ample surface area to apply pressure evenly across the chicken. When using a rolling pin, be mindful of the amount of pressure you apply; you don’t want to shred the chicken instead of flattening it.
Regardless of which tool you choose, the objective remains the same: achieve a consistent thickness that promotes even cooking.
Cutting Board
A cutting board is an essential piece of kitchen equipment that offers a dedicated space for food preparation. Choose a sturdy cutting board that can withstand the pressure of flattening and will protect your countertops from unwanted damage. Opt for a board made from hardwood or plastic, as these materials are easy to clean and sanitize.
Using a cutting board not only provides a stable surface for your chicken but also makes the process less messy. Position the chicken on the board to give yourself ample room to work and ensure that juices do not spill onto your countertop, helping maintain a clean workspace.
Plastic Wrap or Wax Paper
When it comes to flattening chicken, using plastic wrap or wax paper is a game changer. These materials create a barrier between the chicken and your mallet or rolling pin, helping to contain any mess as you pound out the meat. By covering the chicken, you prevent potential splatter from juices, which can make your preparation area more hygienic.
Additionally, using plastic wrap or wax paper prevents the chicken from sticking to the mallet or rolling pin. This ensures that you can easily lift and maneuver the meat during the flattening process and provides a smoother experience overall. Moreover, it helps maintain the texture of the chicken by minimizing direct contact with a hard surface, which can sometimes result in tearing.
Chef’s Knife
A chef’s knife is a versatile tool that deserves its spot in your kitchen when preparing to flatten chicken. While the primary purpose of flattening is to create an even thickness, you may need to first trim the chicken breasts to achieve the best results. The chef’s knife can be used to cut away any excess fat or tendons that might remain on the chicken.
Having a sharp chef’s knife ensures you can make clean cuts without tearing the meat. This is particularly important, as uneven or jagged edges can create inconsistencies in thickness, leading to parts of the chicken that may cook faster or slower than others. Taking the time to trim the chicken properly lays the foundation for a perfectly cooked and aesthetically pleasing dish.
Measuring Cups and Spoons
To truly elevate your chicken parmesan, accurate seasoning and preparation are key. Measuring cups and spoons are essential for ensuring that you apply the right amounts of salt, pepper, and any additional spices or herbs in your seasoning mix. Having precise measurements can significantly impact the final flavor of your dish, making it more enjoyable to eat.
If you plan to brine your chicken, measuring tools will help you prepare the right saline solution. The process of brining not only enhances the chicken’s flavor but also increases its moisture content, which can lead to a juicier and tastier final dish. When seasoning your chicken before flattening, using precise measurements helps ensure an even distribution of flavors, so every bite of your chicken parmesan is delicious.
By gathering these utensils before you start preparing your chicken parmesan, you will streamline the flattening process and set yourself up for success. Utilizing the right tools not only enhances convenience but also ensures that you achieve the best results from your effort in the kitchen. Now you’re ready to get started on making a chicken parmesan that will impress everyone at the dinner table!
Optional Tools to Consider
If you want to take your chicken flattening skills to the next level, consider the following:
- Food Processor: For making quick work of breadcrumbs for breading your chicken parmesan.
- Tenderizer: If you prefer pre-tenderized chicken, using a tenderizer can help prepare your meat ahead of time.
Step-by-Step Guide: How to Flatten Chicken for Chicken Parmesan
Step 1: Choose the Right Chicken Cut
When preparing chicken parmesan, you typically use boneless, skinless chicken breasts. When selecting your chicken, look for breasts that are of uniform thickness, as this makes flattening more manageable.
Step 2: Prepare the Chicken
Trimming the Chicken Breasts
- Lay the chicken breast on the cutting board and remove any visible fat or tendons with your chef’s knife. This helps ensure the best texture in your final dish.
- Pat the chicken breasts dry with paper towels. Moisture can interfere with the flattening process.
Brine the Chicken (Optional)
If you want juicy chicken, consider brining the breasts in a simple saltwater solution for about 30 minutes before flattening. This adds moisture and enhances flavor.
Step 3: Flattening the Chicken
Choosing Your Method
Method 1: Using a Meat Mallet
- Place the chicken breast between two pieces of plastic wrap or wax paper.
- With the smooth side of the meat mallet, gently pound down from the center towards the edges. Rotate the chicken occasionally to ensure an even thickness of about ½ inch.
Method 2: Using a Rolling Pin
- Place the chicken breast on the cutting board. Cover it with plastic wrap or wax paper.
- Roll out the chicken from the center towards the edges, applying even pressure until you reach your desired thickness.
Step 4: Inspect the Chicken for Evenness
Once you’ve flattened your chicken, take a moment to inspect it. Each piece should be about ½ inch thick for even cooking. If you notice any spots that are thicker, gently pound them down again.
Pro Tips for Perfectly Flattened Chicken
Maintaining Moisture and Tenderness
- Keep it Cold: If you find the chicken getting mushy during flattening, place it in the freezer for about 15 minutes. This firms it up and makes the process easier.
- Use a Gentle Hand: Avoid pounding too hard. The goal is to flatten, not to shred the meat.
Seasoning Before Bread Crumbing
Once flattened, season your chicken generously with salt, pepper, and your favorite herbs or spices. This will ensure that flavor penetrates the meat before you coat it in breadcrumbs.
Cooking Chicken Parmesan to Perfection
Preparing Your Breading Station
- Setup: You’ll need three shallow bowls—one with flour, another with beaten eggs, and a third with breadcrumbs mixed with grated Parmesan cheese.
- Dredging Process: Take each flattened chicken breast and coat it in flour, shaking off excess. Dip into the egg mixture, allowing it to drip, then press into the breadcrumb mixture.
Baking or Frying Your Chicken
For traditional chicken parmesan, a quick flash fry followed by baking is recommended. Here’s a simple guideline:
Flash Frying
- Heat a generous amount of oil in a skillet over medium-high heat.
- Place the breaded chicken in the skillet and cook for about 3-4 minutes per side or until golden brown.
Baking
After frying, transfer the chicken to a baking dish. Top with your favorite marinara sauce and mozzarella cheese. Bake at 375°F (190°C) for about 20-25 minutes or until the chicken reaches an internal temperature of 165°F (74°C).
Serving Your Delicious Chicken Parmesan
Serve your chicken parmesan with spaghetti, garlic bread, or a fresh salad for a full meal. Drizzle with additional marinara sauce and garnish with fresh basil or parsley for a beautiful presentation.
Troubleshooting Common Issues with Flattened Chicken
Uneven Cooking or Dryness
If your chicken tends to dry out, consider lowering the cooking temperature. Cooking at high heat might brown the outside before the inside is done.
Excessive Thickness
If some pieces of chicken are thicker than others, they will cook at different rates. Always check your pieces during cooking to ensure they are evenly done.
Sticking to Pans
To avoid chicken sticking to your pans, ensure your oil is hot enough before adding the chicken. You can test this by dropping a pinch of breadcrumbs into the oil; if it sizzles, you’re good to go.
Conclusion
Flattening chicken for chicken parmesan is an essential skill that can elevate your cooking and ensure delicious results every time. By understanding the importance of this technique and following the steps provided in this guide, you can achieve tender, evenly cooked chicken that pairs perfectly with rich marinara sauce and gooey cheese. Now that you’re equipped with all this knowledge, it’s time to get into your kitchen and start perfecting your chicken parmesan!


